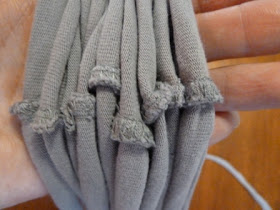
If you're anything like me your wardrobe is probably filled
with old t-shirts and tops! With the cooler weather on it's way why not
turn those old tops into a gorgeous scarf.
I am always on the lookout for things to upcycle and when I came across some
t-shirt scarves and necklaces on Pintrest lately I figured I may as well try
and make one of my own!
Here was my inspiration for the project. I search high and low but the link
to this particular image doesn't seem to exist anymore...
I found a lot of tutorials online but they all seemed to do it differently so here is my take on the braided t-shirt scarf. Enjoy :)
First of all this is a super cheap project that takes less than an hour to finish. Now that's my kind of DIY!
You will need an old t-shirt (the bigger the shirt the longer and thicker your scarf will be), a pair of scissors and a hot glue gun.
When you select your shirt check how stretchy the material is, you want to choose one that still has some give in it. I found fabric with a tighter weave and some elastine in it worked best.
Shirts without seams will give you more flexibility in your design but I couldn't find one. Not to worry though as we'll be covering up the seams later.
Step 1. Line up the bottom of your shirt so the hem is even, then cut off the hem in a straight line.
Step 2. Cut a straight line just below the armpits to create a large rectangle of fabric. Put the top of the t-shirt to the side, we'll be using some of it later.
Step 3. Now cut the rectangle of fabric into 1 to 1 1/2 inch strips (about 3cm). Don't worry if your strips are perfectly straight or even, this is a very forgiving project!
Step 4. Now for some exercise! Stretch the strips of fabric as far as you can. I ended up putting them under the arch of my foot and pulling them up towards my chin, kind of like a pilates class! The longer the strips, the longer your scarf will be. Try and make them all similar in length.
Step 5. Once you have stretched them out gather all the seams together. Tightly tie them together just below the seams using a small strip of fabric you have cut out of the top part of the t-shirt. You will need 3 of these ties.
Step 6. Cut the fabric strands between the knot and the seams. Don't cut so close to the knot that the strands fall out though.
Step 7. Straighten out and untangle the strands as much as you can and use the other small strip to tie them together slightly above the seams.
Step 8. Divide the strips into equal thirds and start braiding them together. Make sure you pull the strands all the way through so they don't become tangled. And don't make the braid too tight either.
Step 9. Every now and then test it around your neck by holding the two ends together. Stop braiding when you have reached the length you want. Either use another small strip of fabric from the top of the tshirt or wind one of the longer strands from the braid around the base of the braid and create a tight knot. Once it is secure cut off the rest of the strands.
Step 10. Now it's time for the hot glue gun (or needle and thread if you prefer). Pop a dab of glue on one end and join it together with the other end. Don't worry, we'll pretty it up soon :) If you want to make it super secure you could also knot the two little ties together.
Your scarf should now look something like this:
Step 11. Cut two small rectangles from the top part of your shirt. You could use ribbon or a contrasting material if you prefer. These strips are about 10cm wide by 15cm long. Give them a little stretch so the raw edges roll in.
Step 12. Pop a bit of glue over each join and wrap the fabric around it. Tuck the end underneath one of the layers and secure it in place with a bit of glue.
You're all done :)
I'd love to see any creations you come up with so feel free to leave a comment with a link to your pics :)


